Tuesday, July 24, 2007

Mine's Mine - More Beauty Shots!

Here's more takes by popular demand. Close up of the side plate below. Side plates are connected to the wing via 2 M6 allen socket cap head bolts.
Top View. Nice contrast with the Slowtra's new boot silver paintjob. My regular Painter did a massive job but he ain't cheap!
Another shot!
Side view

Last pix before things get too dark. IMHO the Mine's Multi Select wing manages to look aggressive yet subtle at the same time.

Tuesday, July 17, 2007

Mine's Mine - Installed!

Finally had some spare time to get the Mine's Multi Select Rear Wing installed today. Installation was relatively painless taking only bout an hour. All that needed to be done was to ensure proper placement of the spoiler before drilling 4 holes for the mounting brackets/legs. Before doing that you have to remove the stock NVH carpet mounted to the bottom of the boot lid. I did junk the supplied rubber washers for the base of the wing's mounting bracket and had washers cut from thicker rubber supplied by a Bro. Also replaced the stock mild steel bolts, nuts and washers with stainless steel items. Oh, and once you install don't forget to adjust the angle of attack and ensure everything's tightened properly. Don't want to have the wing or plates fly off and sushi someone when you're at speed!

Pixs of the wing below before installation. The wing came with everything including the side plates installed but I dismantled them for some decent waxing! Disassembly also showed me the wing is not 100% carbon but primarily frp with carbon only top and bottom layers. Very expensive for the retail price but the quality really shows especially in the perfect weave of the carbon. Did not weight the Mine's wing but I'm convinced it's lighter than the Nismo lip spoiler having carried both.

The machined from aluminium mounting legs. The wing is adjustable for angle of attack only. Height is fixed. The base can be pivoted a couple degrees to the right or left to help ease the installation and placement.
First installed pixs below.


Should I stick a Mine's sticker to the Slowtra? Talk about mid life crisis :P

Have to admit it looks damn good and not too Beng! Even my mech that's normally not into rice or carbon admitted it look good. Come to think of it, this is the smallest lowest spoiler I had. My first car, a Wira 1.3 had the 1.8's tiang gol spoiler while the SP had the Mirage Asti High Spoiler which was also quite massive. More pixs to follow once I get the car back. Have sent it for painting to fix the holes drilled earlier on the boot from the abandoned Nismo carbon spoiler/lip project. Ouch!

Thursday, July 12, 2007

Got Matt Bronze Wheels?

This ad first appeared in October 2003 issue of Option 2 magazine but never caught my eye until only recently . All this after nearly four years. Thank God I didn't throw away my old Option 2 mag collection..
All will be revealed in due time but no promises. Pls be patient :)

Tuesday, July 10, 2007

Detailing - Autoglym


There's nothing more satisfying than admiring the shine of your car after a couple hours of your own muscle, sweat and sometimes blood! Nobody cleans and details my car but myself. Have been using Autoglym products for close to a decade and nothing comes more highly recommended when it comes to cleaning, waxing and polishing your car. Below are the Autoglym products I've used most. Warning they're not cheap! All the products in picture above will cost more than RM300 if bought one shot. No joke.

Bodywork Shampoo Conditioner
Careful regular washing with Autoglym Bodywork Shampoo Conditioner removes traffic film and greatly assists in preserving the finish and appearance of your vehicle. It's also perfect for maintaining the wax/gloss finish of your vehicle. Get yourself a decent sponge and shampoo the car from top front to rear then the bottom part of your car. Leave the wheels last.

Super Resin Polish
This used to be my mainstay cleaner/polish/sealant but has since been superseeded by the Ultra Deep Shine. I still use it for areas less exposed to the elements plus it's much cheaper! More prone to leaving spider webbing marks if you are not careful compared to Ultra Deep Shine. Autoglym Super Resin Polish contains low molecular weight resins which provide exceptional cosmetic effect and protection from most environmental hazards.

Ultra Deep Shine
This is the bees knees man and is my mainstay cleaner/polish/sealant. Specially formulated using the finest modern polishing and coating technology to impart a tough durable finish to a wide range of paint colours, new or old. The shine it leaves has to be seen to be believed. People who have seen the car cannot believe that the paint is years and not days old. You start the car with the Ultra Deep Shine first. Use a decent clean cotton cloth. I have used the Autoglym Perfect Polishing Cloth previously but am not too partial to it plus I find it overpriced. You can get cotton cloth in packs of 3 from places like Tesco. Cheap and good! Takes about 3 hours to do the Slowtra. Buff the car with the cloth & Ultra Deep Shine first then leave it to dry. Wipe off once the Ultra Deep Shine dries to a haze . I usually start with the bonnet then roof then doors/sides and finally bumpers.

Liquid Hardwax
Previously used the Extra Gloss Protection but this last loads longer. Cost much more too unfortunately. Formulated with tough synthetic resins and waxes. Once you have completed the Ultra Deep Shine portion you then apply this to the polished part of the car. Leave to dry for about 2 or more hours then wipe off with a clean dry cotton cloth. After than run your hands over the car and enjoy the smooth/glossiness. Smooth as a baby's bottom they say. All in all detailing the car with Ultra Deep Shine and Liquid Hardwax will take me most of the day (around 6-8 hours).

Leather Cleaner and Leather Care Cream (not in picture as I ran out)
Good for cleaning your leather interior. And No you can't use this on fabric. Once you've cleaned the leather interior apply the Autoglym Leather Care Cream. Autoglym Leather Care Cream is a carefully blended emulsion containing soaps and natural oils to protect and moisture the leather.

Instant Tyre Dressing
I use this not only for my tyres but also for exterior plastics and vinyl. Works a treat on the headlights and foglights too! A bit overprice though so if budget's tight use some other product.

Will talk about non-Autoglym detailing products I'm using next..

Sunday, July 8, 2007

Redline MT90 Transmission Oil

The N16 manual gearbox is not the quietest and famous for whining especially during slow 1st-2nd gear traffic jam gear speeds Penang is famous for. Bloody irritating unless you crank up the ICE! With mileage now approaching 20K km it was time to replace the gearbox oil anyway and I looked around for a decent synthetic transmission oil that would help reduce the gearbox whine while providing adequate protection and minimizing transmission loss. Having used the excellent Redline 75W90 previously on the SP my 1st choice would again be from Redline. Will not be using the 75W90 on the Slowtra as it's rated GL5 and besides I would not be using the friction modifiers in the 75W90 as the Slowtra does not have a limited slip diff. Using the 75W90 would just increase gearbox wear. You have been warned! The service manual states that gearbox oil with 75W90 viscocity and GL-4 rating be used. Referrencing Redline's web page led me to the MT-90 which is the correct specification transmission oil for my gearbox. I settled for the MT-90 rather than MTL for the comfort of additional protection as the Slowtra is not a race car. Man this sounds like a condom or birth control advertisement! Those with auto-gearboxes can look elsewhere.

However it did take some time to order the MT90 as it's not common unlike the more popular MTL. Northern Garage ordered some for me (Thanks Ah Loy) and a stock of MT-90 arrived in about 2 weeks. The N16's big fat manual gearbox needs about 3+ bottles as one MT-90 bottle is listed at 1 quart (0.946 litres) thanks to the American's love of everything non-metric. This means that you have to order 4 bottles unfortunately. One bottle is around Rm55 so total cost is RM220. Definitely not cheap! Picture below of the MT-90 sitting in my room

Closeup
I had the Slowtra checked in yesterday (Sat) for tranny oil change at my usual workshop. Decided to skip TCEAS as I'm not partial to paying big bucks for a simple gearbox oil change. Only cost me RM8 labour at my usual place. Pix below of the bolt plug (in red box) which needs to be loosened to drain the gearbox oil.
Took some time to drain out all the gearbox oil. I would leave things for at least 30-45 min before refilling. Cleaned the underside of the Slowtra with healthy doses of WD90 during this time. Pix below of fresh MT90 being pumped into the gearbox. Car next to mine is my Bro CP's 200bhp Proton Satria Monster!

Driving home from the workshop the differences were instantly noticeable. Gearshifts felt slicker and the tranny whine is less but unfortunately not 100% eliminated. The downside is more pronounced tyre roar at slow speeds now. This means there is less tranny whine to mask the tyre noise. All in all a decent investment!

Wednesday, June 20, 2007

Nissan N15 DTC (German Touring Car) Racecar

Was digging thru my old racecar archives to post in the N16MO forum bout how to properly lower your car and I found this. Thought I'll just go ahead and blab a bit since the Pulsar/Almera N15 is the N16's Daddy. Might be late 90s touring car technology but this is still state of the art as far as I'm concerned and shows how much effort goes into a race car despite everything looking stock externally. Red boxes below show how much the top suspension mount has been raised to ensure sufficient suspension travel after extreme lowering. Engine uses a carbon plenum (inlet manifold) and single throttle body. And just look at the size of the blue anodized oil catch tank! The compression must be stupendous for a naturally aspirated engine to generate so much crankcase pressure. All major plumbing is via AN fittings and stainless steel braided hoses. Lesser ones are silicone. Major investment here alone.
Engine mount is fabricated from a block of solid aluminium to minimize engine movement. Obviously NVH comfy comfy is not a factor in a racecar.
The engine in it's glory after disassembly from car. Huge throttle body!

There are bellmouths for each cylinder in the inlet manifold

And here is the camshaft. Now that's what I call duration and overlap!

Rear suspension assembly below. Anti-roll bar is a very yellow blade type, adjutable and goes thru the spare tyre well. All links are spherical bearinged. Like the N16 the N15 uses a torsion beam rear suspension configuration. Rear dampers are running helper springs (black) and the main spring (red) is linear type and extremely stiff from the looks of it (how fat each spring coil is).

Cockpit nothing much to look at except Pi Research datalogger and integrated digital display. Pedal box assy is hinged from the floor. Rollcage tubing runs through the dash.

As trick as this might look it's still relatively Group N+ (production) based and nowhere near as developed as the old school touring cars such as the BTCC Primera. Will do an article on that stupendous piece of technology when time permits..

Thursday, June 7, 2007

Mine's Mine - Teaser

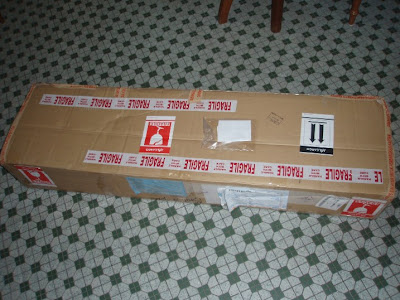
This arrived yesterday from Japan via EMS/Pos Laju courier service. As expected finishing is flawless and good enough to lick! Plans are in place to install and paint the boot lid in due time when I'm not doing my house. Stay tuned for a full lowdown...


Oh... plus I think it's time to get some trick forged wheels. See how things develop..

Saturday, June 2, 2007

DK Schweizer Leather Seat Upholstery and Interior Trim

The stock fabric upholstery adourning the Slowtra's seats really suck big time and make an otherwise pretty classy interior look really bargain basement cheap. Frankly I don't know what TCM was doing when the design for the seat upholstery was chosen. Anyway I decided to go for DK leather upholstery after being introduced by my school classmate and Bro. DK Schweizer is an established company in Bolehland having supplied many auto manufacturers including Chevrolet, Proton (ok.. save your Proton jokes pls. IMHO the leather upholstery in the latest Waja is actually pretty decent), Honda, Ford, Mitsubishi, etc. More details in DK's webpage.

Design of the leather upholstery is courtesy of Bro Fooyc (Thanks Bro!). I think this design is very sporty and contemporary with the perforated leather trim looking ala Brabus Mastik leather. This is a great relief as leather upholstery can sometimes look "Ah Pek". I choosed a dark grey colour rather than black for practical purposes. As you know black colour is really good at absorbing heat while going too light a colour means that any dirt or stains on the seats would show up easily. The leather material is imported from Germany and the upholstery is full leather unlike some oem leather upholstery which actually feature PVC for the sides of the seat for example. I also had the centre arm rest cover and shifter boot done up in leather. Wanted to do the steering wheel but unfortunately the machine to test the SRS airbag is only found in KL. This means that I will have to dismantle my steeering wheel and then send it to DK KL for wrapping. The whole exercise takes about a week which means that I can't drive my car during that period. Boo Hoo! Too much hassle if you ask me. Anyone want to lend me a N16 steering wheel?

Installation was pretty quick and painless. I checked the car in around 10am in the morning and everything was done by 2pm. The whole exercise cost me 2000 smackers which is very reasonable when you look at the quality of the work and the fact that the upholstery is full leather.

Pix below of the front passenger seat. The grey is actually darker but my Olympus camera had difficulty resolving the correct grey shade. The interior classiness and ambience really went up a notch after doing the leather upholstery.

Rear Seats

Close up of the perforated leather centre section.

Door trim

The downsides? Well apart from the higher cost, leather can be a pain to maintain if you always want it to look supple and soft. Also the leather material retains heat better which means that things can get sticky if you're the type that sweat a lot like me. Overall I'm very happy with the DK leather upholstery. Have received lotsa compliments on the leather upholstery and wifey really loves it compared to the beige leather/PVC upholstery in her Optra.

Thursday, May 31, 2007

Speed Cut Not!

I've said this many times in forums and I'll say it again. The N16 be it 1.6/1.8, Pre-FL, FL1 or FL2 does not come with a 160km/h (could be 170km/h depending on which joker you choose to believe) speed cut. There is a rev cut to prevent overenthuasiastic raging hormone youngsters from revving the poor engine to death due to high rpm valve float and the eventual piston to valve contact but no Speed Cut! I have reviewed the N16's service manual and the very detailed 702 paged Engine Control System (EC) section does not mention any speed cut. I have also to-date twice personally taken the Slowtra to speeds in excess on 180km/h and have spoken of my findings yet people still choose to believe in urband legends. Maybe they think they're driving some pseudo Sylvia or God forbid Skyline supercar wannabee with an engine just waiting to be unlocked and unleashed with just a simple speed cut device or wiring tapping. And NO that device behind your glovebox is not the damn speed cut. That device is only responsible for activating your door locks at a certain speed.

Obviously there is a trick to doing a top speed run. The trick here is to max out 4th gear as much as possible before you hit 5th. If you're driving a slushbox too bad :P For those with manual gearboxes don't expect to hit top speed real soon if you shift to 5th gear around 90-100km/h and mash the throttle pedal to the metal. I don't call my car the Slowtra for nothing...

Friday, May 25, 2007

Round 5: Major Build Part 2: Tru Technology Billet Series B2110 Amplifier

I was ready to drive home after my latest round of ICE upgrades when my bro Eric Lim turned up at Golden to let me audition his Tru Technology Billet amps. After a short audition I was left relatively speechless. Per my short ICE experience these amps come closest to equalling the sound quality of a decent home amp setup. The speed, control and dynamic range is simply breathtaking. Unbelievably the treble was clear and precise while being grain and harshness free. The soundstaging was also improved. All this from an amp! Funny one guy actually wrote a thesis that all amps sounds the same...

The Tru Technology Billet series amplifiers are the latest midrange amps in Tru's range. The highest being the mega expensive Copper range while the lowest range is the Steel series. The Billet series amp is also upgradable with removable "Plug n Play" preamp cards. There is also a preamp bypass feature. My recommendation is to immediately go for the preamp bypass switch and have the preamp turned off. The sound quality really went up a notch especially in terms of clarity and separation. Make sure your HU's pre-out is at least 5V though. I've heard of good review on the preamps upgrades (especially the Burr Brown pre-amp upgrade) but have not audition so cannot comment if these are better than with the preamp turned off. The upgrades are not cheap mind you! The upgrade cost bout 1K. There is a long list of features for the Billet series amps in Tru's web page. Needless to say these amps are designed to keep you happy for a long long time unless you're crazy or poisoned enough aspire towards megabuck 5 figure dollar amps.

I decided to go for the Billet B2110 2-channel amp for simplicity sake. Although the quoted power output is 110W RMS at 4ohms impedance, the real measure output is closer to 150W RMS. These amps also feature a 1000W power supply. This means that nothing will faze them unless you're an SPL junkie. You can get these amps from Audio Creations (look for Mike or Victor) in the Klang Valley or Unker Yeoh at my favourite ICE shop - Golden in Penang. Pix of amp below. Someone went and set the ISO setting on my Olympus camera to max hence the noisy lousy picture quality.

Love the look of these amps. The industrial styling and blue led lighting reminds me of Krell amps without the excessiveness. The size is a bit different from the Steg QmosII 105.4X amp I was now junking so the amp rack had to be modified. This means I now couldn't drive home so had to leave my car at Unker's again. Uncle David took about a week plus to fab everything. Pix of revised amp rack and lower board. The 2 big round holes on the centre of the board are for the cooling fans as the Billet amp feature 2 such fans at the bottom of the amp casing. Make sure you have sufficient ventilation as this amp can really run hot especially with the pre-amp turned off. Having said that I have not had any thermal issues despite blasting at relatively loud levels for hours.

Pix of Billet B2110 amp installed. Looks very contemporary with the more Beng looking Steg K Competition amp.

Closeup of the Billet amp installed.

I also decided to replace the thin perspex amp rack "window" panels with much thicker machined items. Pix of the new acryllic panels below. Blardy lovely but also blardy expensive. Heavy too unfortunately. What price aesthetics and IASCA competition winning build quality? Home audio setup behind is my Bro's megabuck Proceed range.
Pix below of the acryllic cover panels installed. The panels are fastened to the amp rack front cover panel via countersunk stainless steel bolts. I love blue lights!
Cover for Rockford Fosgate fused distribution box. I know this is an old school fuse distribution box but I could not find a better looking fuse distribution box.
The whole assembly! Sub looks a bit small! :)

Trunk floorboard looks stock eh?

Lift the centre panel out and walah! Full access to spare tyre, jack and toolkit. Which reminds me I need to pump air into the spare tyre. Unker's build quality is top notch.

6 months down the road and I'm still very happy with this amp as I have not been susceptible to upgrade poisoning (yet). If you buy the Tru Billet amp be prepared for a long long run in time. These amps only really start to sound their best after 3-4 months of running-in. Also be careful with the gain settings. Settings that are too high will result in brightness. Get the settings right and the treble and midrange is silky smooth without losing clarity. Very European sounding amp from a US manufacturer.

Thursday, May 24, 2007

Even More Pissed!

The rear number plate fell out the other day. Yes, the expensive carbon number plate. Cost saving and too much cheapo CSM was used during manufacturing thus causing shrinkage and the number plate to become slightly curved after exposure to heat from the sun. This caused the double sided tape on the centre part of the number plate to fail first and then ultimately both sides and the number plate fell off. Luckily the car was parked when this happened. This means that I had to drive to work without a rear number plate. Luckily there were no cops. Went to Unker's and had a normal rear number plate dome up and installed after work. Rather than feeling down and whine more I've contacted several of my UK based carbon composite manufacturing contacts to do me 100% carbon wet lay-up number plates. Awaiting the quote..

Sunday, May 20, 2007

Pissed and Disappointed

Some of you might be wondering why there's no post on my finished carbon rear spoiler. Well I've been too busy with work and my new home to follow up on the progress and it actually took a couple of weeks before the spoiler got installed. When I came home from work to view the installed article I nearly got a heart attack. Pix below.


Can't believe this is the same Bro and family friend responsible for all the trick cf parts on the SP. Excuse apparently was no compressor. As you can see the clearcoating is too thick and there are major blotches once the sun heats it up. Looks more like the surface of the moon! Also looks like the person that did this was trying to take shortcuts in fixing the pinholes. There was also too much black paint on the affected area. Sure signs of a cover up if you asked me. Another pix below.

I have requested the Bro to either fix this or make me another spoiler but it looks like he's now giving me the round the mulberry bush excuses. You know who you are! The spoiler has since been removed from my car and leaving two drilled holes which I have to cover with tape. Dammit! Even my painter refused to fix this for me asking me to go get a new one made. Was work on-call last week and spend some of my "house arrest" time sanding the spoiler with 240 grit sand paper. Sanded till my forearms ache and things looked a bit better. Will continue sanding but honestly I'm so pissed and ashamed that I've given up hope on this spoiler. This will be the last time I'm getting any carbon parts from the "Bro".

Sorrow and frustration led me to research a proper aftermarket carbon spoiler/wing for the Slowtra and the Mine's Multi Select Carbon Rear Wing caught my eye. Pix (courtesy of Turbo magazine) below of said spoiler fitted to Mine's 350Z project car.


Another pix

It's still wet lay-up carbon though. This spoiler also looks suspiciously like a rip-off from a AC Schnitzer E46 Beemer wing. Not that I care so long as it looks good on the Slowtra. I've been in communication with Mine's Japan and also my Jap contact. Only thing preventing me from getting the spoiler so far is the massive cost. All RM3K+ of it. Will see how things develop before I make a decision...

Saturday, May 19, 2007

Carbon Number Plates Installed

Installing my carbon number plates which actually should have just taken a couple minutes ended up being a few days affair. The drama started with me specifiying the front number plate with less width compared to the stock chrome number plate carrier. I didn't want too wide a number plate as a narrower version looks better and doesn't cost as much in carbon materials. This means that I can save some money!! Haha.. I also decided to ditch the crappy looking chrome framed front and rear number plate carriers. Now this is where the problem starts. Upon removing the stock front number plate carrier I discovered that the stupid chrome framed metal plate had grown to like the front bumper so much that it left an indellible scar on the front bumper. The sharp edge of the number plate carrier had come into contact with the number plate and removed some paint from the bumper in the process. Love bite pix below. Damn!

The carbon number plate proved to be too narrow to cover up the scar. This now meant that I had 2 options. Option 1 was to make a larger front number plate. Option 2 was to send the said car and front bumper for painting to remove the love bite. Of course one could argue that there's a third option which is to do nothing and just install the carbon number plate and pretend the scar's not visible. But you know me..

Anyway I decided to go for Option 2 as that's cheaper and arguably faster. This means that I had to leave the Slowtra with my mech (again). In the meantime here's the crappy stock chromed framed front number plate carrier. The bolts that hold the number plate carrier to bumper had rusted to kingdom come and stained the numper plate carrier. How cheap can TCM get? Looks like the metal used to fashion the number plate carrier is so thin that double sided tape is used on both sides to secure the carrier to the bumper and prevent it from flapping around when subjected to air/wind pressure thus causing even more love bites.

Luckily I had no issues with the rear number plate so I installed that first. Pix below. IMHO carbon looks damn fab against a silver background!

The Slowtra came back 2 days later from painting and I installed the numper plate the next day. Pix below.

Both front and rear number plates are attached to the bumpers via 3M double sided tape only. Unless you stand less than 3 feet away the carbon number plate looks stock. What do you think of the end result? Worth all the hassle?

Sunday, May 13, 2007

AC Delco Wiper Blades

After about a year or so of usage it was time to replace the stock NWB (Nippon Wiper Blade) wiper blades. Our lovely weather and long lasting wiper blades unfortunately don't mix. The N16 uses a pair of 22" and 16" sized wiper blades. Settled on the AC Delcos. These are made in Korea and set me back RM40 for a pair. Pix below.

Installation took me bout a minute and more time was spent opening the packaging :) Have been through several downpours with these wiper blades and so far so good. Noise is absent and the wiping action/results is optimal.

Thursday, May 3, 2007

Got Lightweight?

Ordered some lightweight aluminium allen socket cap bolts and washers from Hyperbolt UK which dutifully arrived at my doorstep after 2 weeks or so of patient waiting. A full article of fastener material and technology can be found in my old SP Files article.

Picture below of said bolts and packaging against a background of the ASM S2000 Tsukuba Special Time Attack Racecar. Very suitable don't you think as the super lightweight carbon bodied ASM S2000 race car was able to lap Tsukuba at an unbelievable time (for an NA RWD car) of 57. 488 secs. Bolts ordered include potassium bichromate plating (cheaper) and silver anodized.

Closeup

Bolts sans packaging.

The potassium bichromate bolts have a greyish or goldish tinge whereas the silver anodize bolts looks like stainless steel cept weights 60% less. Cost per bolt was about RM3-4 per bolt not including shipping. Fasteners were about RM2+. Shipping for the whole hog was a massive RM40+. The whole shipment should set me back RM200+ including shipping. Still waiting for the credit card bill.

Hyperbolt also shipped me the wrong length for the silver anodized allen socket cap bolts. Ordered M6 X 15mm bolts and packaging even states the same size but when suspicion led me to measure the bolts with a vernier caliper the actual length was only 12mm. Arrrggh! To their credit Hyperbolt admitted their mistake and is in the process of shipping me the silver anodized bolts in the correct length FOC. I plan to eventually replace all if not most of the Slowtra's non-stressed/non-load bearing bolts with lightweight aluminium items and maybe some stressed bolts with Ti items. This should hopefully help to shed some weight. Not cheap though so this will take some time as I can only order the bolts when funds are available. Stay tuned for some pixs of bolts installed.

BTW this actually marks my 50th post in this blog in eleven months. The SP Files is only at 49 posts. Booh Hoo! I would like to thank all my friends and also the significant other for all the support and encouragement. You know who you are! :)