Wednesday, December 26, 2012

All I Want for Christmas is a More Reliable COP

I have had the stock ignition coil over plugs (COPs) failed twice now. Once on the dyno and Toby got second hand replacements. The second time when I was back in Penang. Every time this happens the Shark sounded like a Subaru Impreza WRX wannabee minus the power as the engine was only running on three cylinders. Imagine not being able to exceed 2000rpm in fourth with a top speed of 60km/h :(

The QG18DE runs a distributorless ignition coil over plug setup which Nissan calls NDIS or Nissan Direct Ignition System. This means that the ignition signal is directly sent from the ECU to the inductive ignition COPs which are responsible for igniting/firing the spark plugs. The signal is carried via three very thin wires so don't bother about fatter spark plug cables because a direct ignition system does NOT USE ONE. The COPs that come with all MYDM Nissan Sentra N16s with Series 1 QG15, 16 and 18DEs are of the pencil coil type and are made by Hitachi. Pencil coils have a compact "head" because the coil's magnetic windings are all located in the tube that forms the length of the coil. This results in a neater sleeker looking cylinder head top.

Picture below of the stock Hitachi pencil coils installed.

To date I am not sure why the stock coils are failing on my engine. It could be due to one or a combination of two reasons:
1. A much hotter turbocharged engine/engine bay. Having the coil windings deep into a much hotter engine ain't gonna help and pencil coils are notoriously prone to failing because of this.
2. The ECU will know in advance when it wants the spark from the coil. The target is to start the dwell period (coil charging time) enough in advance of spark event for the primary coil current to reach full energy storage. On a stock engine with stock compression this is not a problem. However a turbocharged engine results in higher cylinder pressure and is more difficult to ignite. A common trick if you are running a programmable ECU like the Autronic SM4 is to increase the dwell period so that the coils have sufficient charge but I believe the dwell tolerance of the stock coils is crap. Increasing it just eventually burns out the windings in the coil creating a short in the circuit. The dwell period is reduced in my Autronic ECU to a very low 2 milliseconds. Anything less and there will not be sufficient charge to ignite the combustion mixture when Sharkie is on boost. Dwell is controlled via software for the SM4.

I believe Nissan also realized this and went for a conventional coil on top of plug type COP on later Series 1 QGs and eventually becoming standard on Series 2 QGs which never made it to Bolehland. The newer coils have the windings in the head versus the tube. Every centimetre farther away from the heat helps. Illustration extracted from Hitachi's website shows both type of ignition COPs.

Picture below of my stock and "newer" ignition coils. Stock COP is at the bottom. Both fits your QG.

Disregard the perspective from my camera making the stock coil appear bigger than the newer type coil. Here's a picture with the newer coil at the bottom if you don't believe me.

I am currently testing the "newer" type COPs which are from the engine I bought. The coils look like crap externally but the important parts inside are in good nick and seem to be holding out fine at this point. A brand new set of 4 newer type ignition coils will be around RM 1.1K-1.3K original Nissan without shipping depending if you purchase from Greg or my Jap supplier Nakahara-san. Picture of the newer type COPs installed. Kinda reminds me of the stock pencil coils being fed the same gamma ray as what turns Bruce Banner into the Incredible Hulk.

The original part number of the newer type COP - 22448-6N001. These are made by Hanshin which is a subsidary of Hitachi. 22448-6N000 is also used. Hitachi's excellent website lists compatible coils. Nissan also uses another oem supplier for JDM QG10 Bluebird Sylphys. The other supplier is Bosch. I am not sure if Bosch COPs fit as I have yet to get my hands on one.

22448-6N001 has been superseeded by 22448-6N015. Use this part number if you have the intention to order some new ones for testing. Below is the part number of all MYDM N16 COPs - 22448-4M500. It's like our N16s are caught in a time warp and have never progressed beyond first gen apart from looks :( I think this is a common Bolehland issue as another example would be the Toyota Camry for its engine and gearbox. If it makes you feel better 22448-6N015 is also used by the Latio/Tiida with HR15/16 engine if I'm not mistaken.

So what is my upgrade plan? I am going to persevere with the newer type stock COPs for the moment as all my upgrade options are expensive and I'm still undecided if to retain the stock inductive ignition or go CDI. More research required. Of course if the newer type COPs also fail prematurely (touch wood) it will then force the decision. Will see how things play out.

Tuesday, December 25, 2012

MotoIQ improves the RS5F70A

There is also a technical explanation on the 70A's strength. The excellent write up can be found here. Those ARP flywheel bolts sure does look familiar :)

Merry Christmas Everyone!!!

Sunday, December 16, 2012

Shark Season Starts in Penang

Yes, Sharkie's finally home. Picture of the Shark being given the final check over.  Car behind and on the hydraulic lift is Bro Mugil's legendary SP.

A quick shot just prior to leaving its home for the last eight months. The three monsters in the background are from left - The Lemon, Toby's TA R35 and the famed GT Auto Evo III drag car which if I understand correctly now has a new owner.

The drive home was fairly uneventful. Brakes are squealing like mad most of the time now especially at low speeds with the Hard Brakes titanium brake backing plate heat shield shims installed. Apologize to all the motorist I frightened when slowing down at traffic lights. Need to get that checked. Clutch also likes to make "Oot Oot!" noises when I slip it driving very slowly or moving from standstill in reverse or first gear but otherwise works like a charm with a very livable pedal feel just a tad stiffer than stock believe it or not. First gear is boost limited via the ecu to 1 bar but Sharkie happily wheelspins at will and freaked wife heck even myself out in 2-3rd gear. Even 4th is damn scary with an abundance of torque steer and a sense of the scenery moving faster than you can react. Hit 180km/h without even trying in fifth till my automatic speed limiter sorry wife instantly cut-in to reduce speed. Super effective!

Unfortunately something akin to Murphy's Law then decided to strike and Sharkie's stay in Penang has so far been anything but uneventful. More to follow...

Tuesday, November 20, 2012

Teaser Shots

Jack and Mugil were at GT Auto and made my day sending me some teasing pixs of the Shark. Here's a couple..

Cusco Smart Cross Wrench

Those of you with aftermarket rims and lug nuts will know that the stock tyre removal wrench that comes with the Sentra is useless and won't fit aftermarket lug nuts such as my Rays. One will have to buy an aftermarket wrench to accomodate the new lug nuts else sit by the side of the road and call your (pls insert appropriate) towing service/friend/spouse/anyone when you have a puncture. From their experiene competing in rallies, Cusco has come up with an innovative lug nut removal tool called the Smart Cross Wrench and boy does it work wonders. The cross wrench actually comes in one piece so that it can be conveniently stored anywhere in the car and will fit 12 hex 17mm, 19mm or 21mm sized lug nuts. Weight is only 0.9kg. I ordered my Cusco Smart Cross Wrench from IRS Japan which took just a couple days to arrive in a nice tube shipping packaging.

Picture below of the Smart Cross Wrench in its own pack. There is only one variant but here's the part number anyway - 00B 060 A. Available in any colour so long it's Cusco blue.

Removing the wrench from its packaging also reveal a freebie Cusco sticker. Cusco claims the cross wrench is 100% made in Japan.

Disassemble the cross wrench by sliding the inner chromed shaft from it's blue coloured outer sleeve. Cusco claims material used is chromed molybdenum (steel I presumed). Dimensions are 400mm X 400mm. Torque capability is 450 Nm.

Below's a picture of the cross wrench with my Rays Engineering Duralumin lug nut which uses the 19mm socket. The chromed shaft should go all the way through the blue shaft to form a "+" instead of a "T" in the picture for more leverage. More details on using the cross wrench can be found @ Cusco's website on the Smart Cross Wrench. You can even watch a video of it courtesy of RallySportDirect.com here.

Sunday, November 18, 2012

Grooming Job

The Shark after a polish and grooming job. Thanks Bro Jack for the c*ck tease! Needs less ride heigh, wider stance and more camber. Hellaflush Yo! Just kidding :)

It's also been a long while since I did some detailing DIY and some of my Autoglym stuff have run out necessitating the purchase of a new batch.

Saturday, November 17, 2012

Thermal Management Part 1

As mentioned previously a turbocharged engine produces lots and lots of heat. Managing this heat is critical if the engine and its ancillaries are to produce the expected power yet last a long time. I have implemented several thermal management/control solutions on the Shark. Let's begin with a turbo blanket. The turbo blanket is basically a cover for the turbine section of the snail and provide the means of reducing turbo lag and more importantly as a heat barrier/shield to protect engine components and other parts in close proximity to the turbo. I settled for a Design Engineering (DEI) Titanium Turbo Shield turbo blanket.

DEI states that the Titanium Turbo Shield is made from pulverized volcanic rock then strained into a fiber material, Titanium Turbo Shields can withstand direct heat up to 1800 F (982.222 Celsius) and 2500 F (1371.111 Celsius) radiant heat. This means retaining more heat in the turbine and less damaging underhood (underbonnet) heat. The result is a cooler air intake temperature and a boost in horsepower! DEI also claims that Titanium Turbo Shield  is stronger and more durable than other turbo blankets or shields, Titanium Turbo Shields include a hi-temp rated silica insulation padding under the tight outer layer for extra added protection against extreme turbo-generated heat.

Due to the size of the EFR6258 I was initially worried bout fitment issues as the EFR is larger than many a Garrett T25/T28 sized snail. Luckily the fit was perfect. The DEI Titanium Turbo Shield turbo blanket T25/T28 application is the same size anyway as the larger T3 application with the only difference being the flange area. You can get the dimensions here. Picture below of my Turbo Shield Kit, part number #010149.

The difference between the kit and Turbo Shield only is the kit includes a downpipe wrap (in the middle of the turbo blanket in the picture above) made of similar material. I should have settled for just the Turbo Shield/blanket as my downpipe is already ceramic coated. Anybody interested in the downpipe wrap? Picture below of the turbo + turbo blanket installed.

Closer up. Pardon the quality. Space is a premium down there and a dark work shop does not help. Dunno why but it is pretty dark and always rains whenever I visit GT Auto. As you can see the turbine is quite near the SPAL radiator fan hence any form of heat shielding helps. Pictures of snails glowing red hot under hard use are not exaggerated.

I was initially interested in an inlet manifold thermal spacer/gasket kit from Outlaw Engineering in the US. However it looks like Outlaw went out of biz while I procrastinated. Luckily MotoIQ led me to Sikky Manufacturing with a similar product called the Thermalnator. Thermalnator is a high temperature shielding gasket which replaces the stock intake manifold gasket. The inlet manifold thermal spacer/gasket's cooling properties reduce heat by stopping metal to metal contact between the intake manifold and the engine block thus reducing the heat of the air entering your engine and robbing horsepower. Sikky claims that this will enable the engine to make up to 5% more power. The basic formula for this is for every 5 degrees F increase in intake air temp, air density is reduced by 1%. The denser the air is, the better the gain in horsepower. Average testing has shown an 25 degrees F drop and up to 35 degrees in some applications. And most importantly Sikky has a Thermalnator application for the QG16/18. Part number of the QG18 Thermalnator is TN_037. Price is also pretty decent at US$ 49.95 not including shipping. Picture below of the QG16/18DE Thermalnator inlet manifold thermal gasket and diagram fro service manual showing where it fits.

I would like to thank Bro Peter for helping to transport the Thermalnator back from the States to Bolehland. Thanks Bro for all the effort and patience in locating the gasket despite the hotel misplacing it. Toby has installed the Thermalnator but I've yet to take any piccies. Going to be super tough for a decent pix as the inlet manifold and gasket is at a place in the engine bay where the sun don't shine.

Monday, November 12, 2012

My Dyno Charts

Here are my official dyno charts. Toby managed to squeeze another couple horsies for the final run. All power quoted is at the wheels. You can do the engine power translation assuming about 10-15% transmission loss.

1.3 bar boost pressure with methanol/water injection activated. Fuel is pumped 97 RON.

Without. The AEM methanol/water injection is adding approximately 11ps at the wheels.
"Only" 1 bar boost.

As mentioned previously the stock COP ignition is fully maxed out at only 1.3 bar of boost. Spark plugs are Denso Iridium Power IK22 which is equivalent to NGK heat range 7 or 1 heat range colder than what I was using on my stock engine. My original goal was 1.5 bar boost but since I already hit my horsepower goals with "only" 1.3 bar this will more than suffice at this point :) Plan is to upgrade the ignition to CDI with the Autronic 500R being a strong contender since I'm on the Autronic SM4 ECU. Other options include M&W or Sparktech.

Oil Change Progress Part 8

There has been progress made but due to personal issues (me mom's health has taken a down turn) I have barely had time to follow up let alone visit GT Auto. Finally did so last weekend and here's a brief summary on the progress and some set backs which have or are in process of being rectified.

The Recaro SR4 seats have been fitted. Car spent a couple of weeks at the installer and came back for the worse cosmetically. There were approximately 10 different scratches/marks all round the Shark. The installer blamed Toby/GT Auto. My car has been @ GT Auto for more than 6 months at this point and never noticed any scratches whenever I visited to check out the Shark so I will not comment further. The installer volunteered to fix the scratches for me but would you go back? I said I will fix the scratches myself and send them the bill but they refused. Despite getting attractive pricing/discount on my seats I will not recommend the Recaro MY distributor/installer to anyone. If you need to get some Recaros have it installed elsewhere please.

This means the Shark had to have its second paint job in two months and was just out of the oven when I arrived @ the paint shop to take a look at it. All the badging and Mine's wing were removed for the paint job and will have to be reapplied/reinstalled once the polish work is done. After 5 years I have also decided to have my Mine's Multi Select rear wing re-clearcoated. The clear coat was starting to fade especially on the end plates.

I asked the boss - Ms Lim BB of Mega Spray (shop is practically next door to GT Auto) how much it would cost to paint all of the Shark together with Glasurit clear coat and was quoted 3K+. Am solely tempted to do this at a latter date. Took some opportunities to snap some pictures but please pardon the quality as it was pretty dark in the shop with a major thunderstorm impending. I also barely had any space to take better angle pictures.

Me dash. No gear indicator problem has been resolved.

Closer up. The Beng blue backlighting can be independently turned on and off. Sorry the flash mucked everything up. 

The dash has been configured on the Shark to display the following:
  • Vehicle speed
  • RPM
  • Gear indicator
  • Turbo boost pressure
  • AFR
  • Oil pressure
  • Water temperature
  • Odometer/mileage
  • Trip
  • Battery voltage
  • Clock
The warning lights on both sides are self explanatory. The low fuel warning light is quite erratic and I might fit a proper fuel gauge later. Some hiccups with the idling were also resolved by sending my stock throttle body complete with IACV to Autronic in OZ whom then responded with a perfected idle map.

The Recaro SR4s. Too much flash from my old camera.

Better but still not quite alright. No budget for SLR la :(

Took a pix also of the driver side but it got screwed up by noise. Better pixs later I guess. The SR4 is basically the same seat fitted to the JDM Honda Integra Type R DC5. Fabric material is Velour Black with JDM red stiching at the sides.

Picture below of the engine bay. Mishimoto radiator + two 12" SPAL fans have been fitted. Will do a write up on the SPAL fans later. There is lots more clearance between the snail and radiator/fans now. Me old battery also decided to retire after many months of lack of usage and got replaced with a Panasonic equivalent. Maintenance free of course. Upgraded Kelford cams have not been installed and will go in next year when I upgrade the ignition. What else is new from the picture? Hint, it's something blue.

Guess it yet? Here's the story. The Shark threw a fit at its mistreatment and refused to start when it was back @ GT Auto after the seat installation. Apparently it already refused to start at the seat installer's but no one told Toby. After some tedious of troubleshooting Toby found out the culprit to be my Tomei Type S fuel pressure regulator. Apparently the diaphgram failed. The Tomei has done < 150km mileage at this point hence Toby is suspecting a fake. More to follow on this. Troubleshooting also took longer because I initially wanted to save some moolah and did not fit a fuel pressure sensor hence me AIM MXL Strada Icon dash could not display fuel pressure. Bummer! Learned my lesson and I've asked Toby to fit a fuel pressure sensor. I have replaced the fpr with a Turbosmart FPR-800. Close up picture of the Turbosmart fpr. The ghetto fpr mount bracket is making itchy for a carbon or aluminium upgrade.

The Turbosmart FPR-800 gets its name because it can flow enough fuel to support 800hp. Base pressure adjustment range is 30-70 PSI. Part number of the blue is TS-0401-1001. Black (1002) is also available which I wanted but Toby says too much black in my engine bay :P

Just a few ends to tie up then it's homecoming time. I know I've mentioned this previously before and I've learned hence won't commit to a date but it will be soon. Can't believe it's been 8 months!

Friday, November 2, 2012

Wilwood Ultralite HPS 32 Vane Brake Rotor

Wilwood only just recently came up with a 310mm diameter, 28mm thick (12.2" X 1.1") brake rotor option so I decided to bite the bullet to cure the juddering problems which I have been experiencing with the Coleman Racing brake rotors. Ordered a pair of Wilwood Ultralite HPS 32 Vane brake rotors from Brian of Fastbrakes. Part number is 160-12206 in the diameter, thickness and bell mounting bolt circle configuration (8 x 7.00") I want. Cost is pretty reasonable @ USD495 for two brake rotors including shipment. Unfortunately I got royally taxed by our dear Customs :( Tax for automotive parts is 43%. Don't say I didn't warn you.

Pictures below of the brake rotor. The rotor was supposed to be zinc plated to prevent corrosion and rust on brake pad unswept areas before shipping to me but Brian forgot. Yes, forgot! Sigh... Got refunded the zinc plating cost though (USD90 for both rotors).

There are 6 slots per rotor. The vanes are straight unlike the directional Colemans making it possible to use the same rotor on left or right hand mounting configurations. Weight is 13.6 lbs (6.18kg) per rotor without centre aluminium mounting hat/bell and fasterners. Technical drawing below of the Wilwood Ultralite HPS 32 Vane brake rotor

Picture below shows the straight non-directional vanes. As the name says there are 32 vanes.

Closeup.

Compare the vanes with the directional Coleman Racing brake rotor here. More to follow when I can find some time to install the Wilwood brake rotors. Am also undecided if I should paint the unswept areas with DIY high temperature spray paint.

Sunday, October 7, 2012

New Ride

Don't worry. I'm not replacing the Shark anytime soon. Me wife's trusty Chevrolet Optra was getting a tad long in the tooth so it was time for a replacement. My initial choice was the Hyundai Elantra 1.8 though it took the wife some convincing as her family is mostly into Hondas and Toyotas. This is when the problem started. To summarize:
  • The car was promised for delivery on August the 22nd. Original booking was done many months before.
  • Me and my wife proceeded to book the registration number.
  • We were informed that the delivery of my wife's car was delayed due to the Hari Raya hols.
  • On the 29th we were informed that the car was finally ready for delivery latest by September 5th and to pay the full downpayment which was not small mind you (RM3X,XXX+).
  • The downpayment was promptly paid. My wife sold her Optra earlier to partly finance the downpayment.
  • On September 6th my wife's Elantra was still MIA. The SA also asked me to take another colour which was not even in my 2nd or 3rd choice. No way! If you are paying so much for a car at the very least you would want a colour you desire. I got pissed and cancelled the booking as the SA still could not tell me when my wife's car in the colour she wants (silver) would be here. I requested for our downpayment back in a few days so we could buy another car.
  • The SA could not tell me when our money would be refunded. I called the branch manager which told me 4 weeks! WTF! When I mentioned I would do whatever it takes legally to claim my money back in as short a time as possible I was told "we can't stop you from doing whatever you want". Talk about customer service! The branch manager even blamed his SA for taking the full downpayment when the car was not here while the SA blamed his manager for telling him to take the downpayment as the car is here. Don't know what kind of sales organization this is.
  • A written complaint to the Sime Darby Hyundai MY website was equally ignored and whomever that managed the customer service was so ignorant or was it stupidity? to even send me a follow up email asking me to rate their service. Obviously I gave the worse rating and demanded my money back which also went unaswered.
  • Took a legal letter to finally drive them to action and I got my money back in only 3 working days. Yes, 3 working days and 4 if you count Saturday as a working day instead of 4 weeks.
No matter how good the Hyundai end product is I will never again buy from Hyundai MY/Sime Darby or at least from that Penang branch on Sungai Pinang road. Period! Between myself and my wife this is our sixth car and we have never seen such ridiculous car sales service.

Anyway I ate humble pie and we placed a booking on my wife's first choice, the new and much maligned (in the American press) Honda Civic 2.0S FB2 in polished metal metallic colour and got her car in bout 2 weeks. Compared to the Elantra's lovely fluidic curvy organic lines the new Civic is a myriad of angles and straight sharp lines except funnily for the mismatched front grille and foglights. Replacing the ridiculous looking front grille with a Modulo item helped clean up the overall front end and results in a much sportier and better looking (to me) car. Never has so small a change resulted in so large an aesthetic impact.

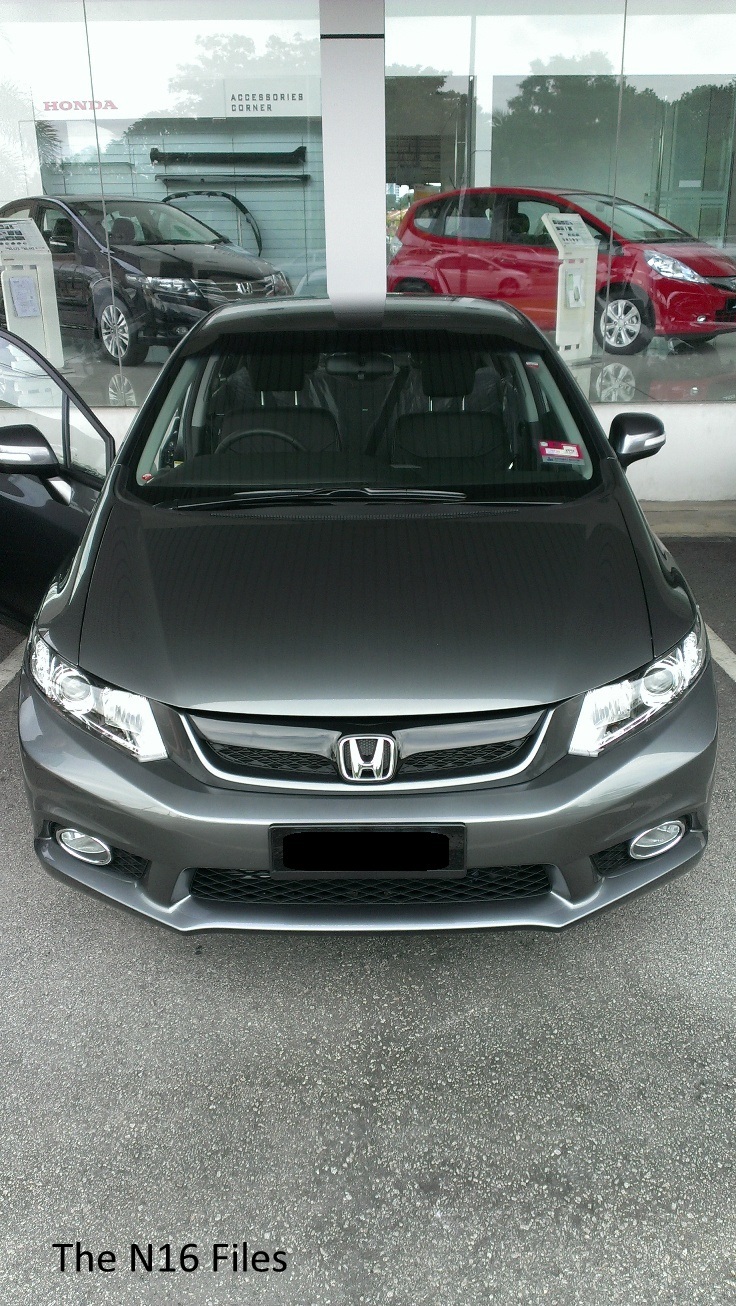
At the showroom on the day of collection. I would say the new Civic is quite a looker with the Modulo front grille and certainly loads better than the USDM non-Si equivalent.

Back home.

Settled on 3M Crystalline tint and PPS teflon coating. Don't have the bandwidth to spend so much time personally waxing, polishing and detailing two cars lar. Shiny eh? HID main headlights work a treat.

Took bout 6-7 hours to get the PPS treatment done. Work only got completed late at night. I only had the exterior painted parts coated. PPS also have coatings for interior and windscreen.

You can read up about 3M Crystalline tint over at MotoIQ. I settled for Crystalline 70 for front windscreen and 60 everywhere else. Don't like the super black tint look lar. Invites trouble from the authorities and everyone else. The Shark in comparison has au naturale tint and Autoglym DIY BST "coating".

Close up of the Modulo front grille. Massive cost (RM890) but worth every penny. The Ah Beng in me is asking if I should go for red Honda badging? Wife in her typical practical way is telling me to not waste money.

The morning after. Side view.

Back home after the coating and tint work.

The Playstation/spaceship lookalike dashboard. There is no engine water temperature gauge but interestingly there are separate low and high water temperature warning lights. The MID already shows you average fuel consumption but Honda decided to add a real-time fuel consumption digital gauge just to let you know how much emphasis is placed on fuel consumption and your driving style.

For such an expensive car (to me) hard plastics are abound everywhere for the interior. Electric power steering feels over assisted especially at slow speeds and has no feel. Wind noise is minimal below 120 km/h and SOHC engine feels quietly refined but lacking the Honda top end pull though to be honest I have yet to whack the car hard given that it has yet to undergo it's first 1K km service. Quick bursts of overtaking acceleration is more than sufficient. Most of the noise is from the tyres. Car is pretty agile with decent handling on fast corners so long as you don't pretend its a Type Aarrr with equivalent handling and power.

Chassis feels sufficiently rigid though I would have liked less body roll. The Michelin PS3s tyres are not helping here with its soft feel sidewall. Pedal gear shifter will automatically shift down for you if you are too slow but will not auto-shift up. Pressing the green econ button dulls engine throttle response and power even more. Turbo lag without the turbo rush on a NA car? I have yet to muster the patience to use Econ mode long enough to compare with standard mode on fuel efficiency. It is too early to talk about overall fuel efficiency but for such a large car, 17" wheels and a much larger capacity engine, I can safely say the Civic has as good or even better fuel efficiency than me wife's old Chevrolet Optra 1.6 at it's best. Brakes can certainly do with better stopping power though I've been spoilt by the Shark's Wilwoods. Stock ride height is very Low which is giving me reservations on getting the entire Modulo bodykit including front, rear and side skirting.. Don't say I didn't warn you. OK, will stop here for now.

Remember this blog is for the Nissan N16 Sentra :)

Friday, September 21, 2012

Another Ride in the Lemon

My Mishi rad is back from its mod job. Jack did the delivery duties to GT Auto via the Lemon again. Is my radiator one lucky rad or what? Two pictures below of the mod job. Quality work eh? Pictures courtesy of Jack.

And this is how the machined 28mm aluminium tubing looks like before the mod job. I have no idea who the finger model is.

I also have a more extensive and trick radiator/cooling system in the works. Does SPAL and possibly PWR ring a bell? :)

More to follow after re-installation. 

Sunday, September 2, 2012

A Ride in the Lemon

My Mishi radiator that is and not me :(

Rad is on its way to a mod job and should be back for install on the Shark in a couple weeks. Meanwhile the Shark's paint job has just been completed. Toby did not send me any piccies. Pls be patient.